New Youtube Channel

Now that my home's internet speed is upgraded, I can make more videos!
This is my new channel https://www.youtube.com/channel/UCgW4rIH3Gg6Lc8v4G0QlqgA
Please subscribe!

Thursday, December 31, 2009

Lyanne's 1 today!


Lyanne is my 2nd daughter, born on this day 1 year ago.
Her birth was God's planning and thinking back... it really touches my heart on how God really takes care of everything for me.

I thank God for this girl, this little sister to Lydia, whose first words are not "papa" or "mama" or "nen nen" or "mum mum", but "No More", with actions some more :)


We did some early celebration. My side of family celebrated it on Christmas Day itself as most of them will be back that day.
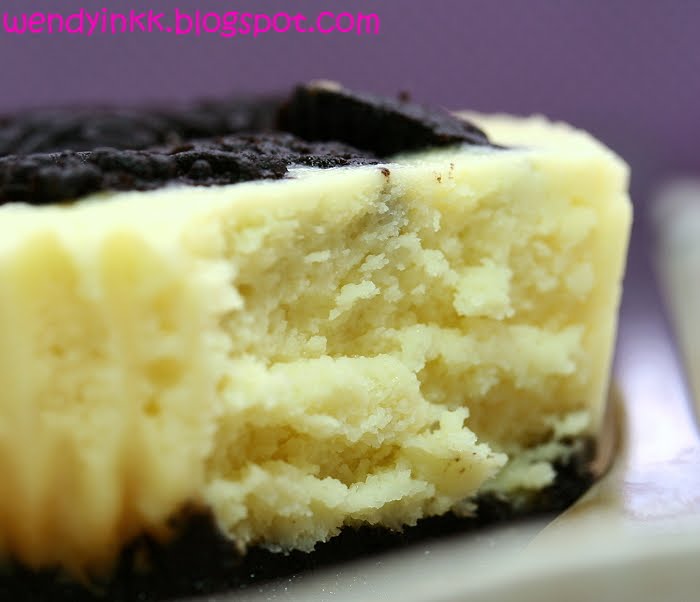
I created a Light Carrot Cake for her... I'm not 100% satisfied with the outcome, need to perfect the recipe. Something feels missing, might be the cinnamon. Need to find a spot to put that in.


Read more...


2nd Cake:
Celebration on Mike's side of family was done on 27th Dec, cos everybody went or were in PJ that day.
Bought by pretty Aunt Iris, Golden Nugget by Secret Recipe. A new release, and everybody that ate it found that it is not as tasty as Secret Recipe usually will be.


Getting ready for the big blow..


As usual, Lydia wants to have her cut tooo:)
Lydia, u better let Lyanne share ur cake too next year....


I would like to take this opportunity to wish all my readers,
Happy New Year
and
May U have a great year ahead!!!

Tuesday, December 29, 2009

Surprise Egg


I once saw on J's Kitchen, carrot cakes baked in egg shells. Wow is all I can say to her.

I saved up some egg shells, not sure if I want to do that for Christmas. But my mind was getting blur as what to bake for give away to my church friends. There was no idea... until just before the baking day (24th), did I only have the whole idea of making a sponge, filling it with cream.


Sponge: This method taught to me by Lydia's nanny produces a less fragile sponge, and I'd say, spongy sponge. It's rather stable, even piping the sponge into the shells didn't deflate the batter much. And it'suitable for all the peeling and breaking of shells.

6 eggs, separated
1/2 tsp cream of tartar
150gm sugar
150gm flour
1/2 tsp baking powder
50gm melted butter

30-35 pcs clean egg shells

1. Preheat oven to 180C.
2.Beat egg whites until frothy, put in cream of tartar and continue to beat until soft peaks, add in sugar gradually and beat until stiff (soft droopy hook peak, but won't fall when overturned).
3. Mix in egg yolks one by one.
4. Sift flour and baking powder. Fold this into (2)
5. Fold in melted butter.
6. Place batter into a piping bag with a 1cm round nozzle.
7. Pipe batter into egg shells(on egg trays) until 2/3 full.
8. Bake for 15 minutes. Cool down totally before filling.

Filling:
1&1/2 cup whipped cream + 2 Tbsp sugar, if using non dairy, omit the sugar
Some strawberries, finely chopped, or pureed
1. Trim cake tops with a knife
2. Place filling into a piping bag fitted with a long filling nozzle.
3. Puncture cake through the top with the filling nozzle until 2/3 of the way into the egg. Pipe in filling, pulling the nozzle upwards slowly.
4. Chill before serving.


Pic above: Right after baked... the top looks like a small mushroom. Trim that off.
Pic below: Packed up and ready to be given away


How to eat:


Just knock the cake to crack the shells... The cake won't break but the shell will. :)


Monday, December 28, 2009

Alcohol-Free Orange Fruit Cake


I know I'm 3 days late to wish all my readers a Merry Merry Christmas!!
And Happy Birthday to my dear Saviour!
I've been busy busy busy.....

My first fruit cakes, made 4 mini loaves, 3 to give away, one to keep. I didn’t want to use Rum, as it’s so so expensive. Liquors are never cheap here. Due to Liquor tax and with our small small currency. And I decided to go with fresh zest rather than candied peels.

From what I read from the net, fruit cakes need to age to get the best flavour out of the fruits, but this fruit cake uses no liquor, so I dare not let it sit and sit for months. I just let it sit in the fridge, wrapped up for 5 days. And today I cut it up and ate it slowly, piece by piece. I like it, really like it. Maybe the zest makes it different, cos I don't really like candied peels. Try this if u love orange as much(or more) as I do :)

150gm glace cherries (mixed red and green, as u wish, coarsely chopped)
100 gm raisins + 100gm currants + 100gm sultanas (or whatever combination u prefer)
200ml orange juice
2 heaped Tbsp orange zest
250gm butter
150gm sugar
225 gm all purpose flour
4 large eggs

I did it shortcut way.. macerated the fruits in just 1 hour rather than overnight.
U may macerate the fruits overnight.

1. Macerate all the fruits and zest with orange juice, overnight preferably.
2. Cream butter and sugar until light and fluffy.
3. Beat in eggs, one by one, beating well after each addition.
4. Mix in flour until well combined.
5. Fold in macerated fruits and whatever juice that is remaining.
6. Place batter into 4 mini loaf pans (3X6)
7. Bake in a preheated oven at 140C(fan)/160C for 1 hour. (bigger pans will take much longer)


Another Christmas gift post coming up soon.. gimme so time to do it :)

Friday, December 18, 2009

Durian Custard Cream Puffs


Remember there was this Durian Shoppe in Klang Valley few years back? They had these durian puffs which were so good. It’s durian season here again and this time, I’m gonna recreate that!!

It’s my first time making Choux pastry. One word---Tiring
Cos my Philips hand held mixer almost went “kaput” beating the eggs into the dough. I had to beat it for 20 seconds, stop the mixer, scrape everything back into the bowl cos they were stuck all between the whisks. Did this more than 10 times.. and I could smell the motor.. Ewwww!!

My brain: “If only I get a Kenwood Chef one of these days…. .”
Mike, did u overhear my mind???? 

But no matter how difficult it was…. The outcome was really good. The choux balls were dry and very puffy.
I’ve eaten some custard cream puffs (sold in KK bakeries) that were soggy and chewy, and I have to say, my choux was an accomplishment *blush*****

After giving some to my neighbor to try, I immediately got orders for this Saturday 
kekekekeke!!!


Choux Pastry:250ml water
90gm butter (salted)
150gm flour
10gm sugar
4 large eggs

1. Sift flour to remove clumps and mix with sugar, set aside.
2. Bring water and butter to a boil on low heat.
3. When butter has fully melted, dump (1) in at one go. Stir immediately with a wooden spoon, and continue to stir until a dough is formed, and it leaves the sides of the pot.
4. Remove pot from heat and leave to cool for 5 minutes.
5. Beat in eggs one by one, making sure each egg is fully incorporated before adding the next. Beat mixture until it is smooth and glossy.
6. Pipe or spoon mixture onto baking trays, about the size of a small lime/calamansi 2 inches apart from each other. Bake in a preheated oven of 190C for 10 mins and 170C for another 15 mins.
7. Cut a small slit immediately upon removal from oven to release steam from inside the puff.
8. Leave to cool down totally before piping in the filling.
Note: If u’re not using a fan-forced oven, u may need to jack up the temperature by 10C each time. And if u want to make larger puffs, extend the 2nd level’s baking time.

Adapted from: The Golden Book of Desserts (Publisher: Page One)


Before baked and after baked!! See the difference? But the pic below was puffs from 2trays, don't worry they don't get so so big that they were touching each other.


Durian Custard Cream
500ml milk
100gm sweet durian flesh (I don’t think D24 works well here, due to the bitterness, unless u like it that way)
1 large egg
80gm sugar or more
2 level Tbsp custard powder
2 level Tbsp all purpose flour

1. Bring milk and durian flesh to boil on low heat.
2. While the milk is coming to a boil, whisk egg with sugar until mixture turns pale. Put in custard powder and flour, stir to combine, make sure there are no lumps.Set aside.
3. Stir milk in pot, making sure the durian flesh looks dissolved. Bring to a boil. Prepare a strainer.
4. Strain ¼ of the hot milk into the beaten egg, and stir well.
5. Strain the rest of the hot milk into the egg mixture. Press the durian pulp to get all the milk mixture out. You’ll see the membranes and whatever insoluble fibres of the durian left in the strainer.
6. Return egg mixture to the pot and cook(stirring all the while) on low heat until custard is thick and no longer taste floury(at this point, if u think it’s not sweet enough add more sugar by the teaspoons, as the sweetness of the durian flesh may vary)
7. Cool custard and chill until ready to use.
8. To fill: either cut a large slit in puff and spoon the custard in or
put custard in piping bag fitted with a small(3mm diameter) round tip and pipe in through the slit that was cut earlier.


The whole bounty of durian puffs-----75 golf balls :)


I made these again few days later with durians of lesser quality.. and I had to double the amount of durian flesh in order to get a good fragrance of it. And by halving the choux amount, my Philips handmixer did a good job. Saved u on that, Mike!

Thursday, December 17, 2009

Oil-less Pandan Chiffon again :)


I did this again, Oil-less Pandan Chiffon. I did not say it's oil free. coconut milk contains oil. :)
Recipe here

Refer to my concentrated pandan juice tip to get really green pandan juice. This time, I managed to get the juice to separate in just 18 hours :)

Abt the crack on my chiffon cake, seriously, I am not bothered about it, as chiffon cakes are usually served upside down. Most of my chiffons crack, and the taste is not affected, neither is the texture.


Friday, December 11, 2009

When the "Unbreakable" breaks.....

The plate above........... and the bowl below


Corelle is so so so expensive here. To get a set of 16 pcs here costs about RM450. But in US, a set of 30 pcs only costs about USD89. It's really cheaper to get a 30 pcs there than to get a 16 pcs here when converted.

My mother in law just came back from Houston and she bought me a set of 30pcs Corelle Pure White Square Set. 6 cups, 6 small bowls, 6 large bowl, 6 medium plates and 6 large plates. When she checked in for her flight, she sent them together with her luggage into the cargo, cos it's supposed to be unbreakable. Alas, they were not. When she arrived in KLIA... cling clang can be heard from inside the box. Darn!!!

When she came home, we quickly opened up to see how many were broken. Hmmm.. I still have 6 cups, 6 small plates, 5 big bowls, 6 medium plates and 6 large plates. How come I have 2 broken bottom pieces??? One piece was definately the big bowl and the other.....*searching searching* Medium plate matched!!! Gosh....They were in the middle. And I still have 6 medium plates. Lucky me! So I consider myself to have one big bowl broken.. broken to shards.... But how come they packed an extra plate in??? They knew that one will soon be broken?? The Corelle workers have the gift of phophecy I guess :)

My mother in law said....Geez, they were flying the Corelle plates in the US commercial, so it wasn't that true... :)
I can't send them in for warranty as they were damaged during travel and that wasn't covered in the warranty. Too bad! Luckilly I had that extra plate :)


Thursday, December 10, 2009

Fried Eggplant with Soy Sauce


Eggplants or aubergines ... They exude a flavour non other can replace.
The skin is a major part of the flavour, w/o it, the fragrance is much much milder.

My grandaunt did not like to eat much of this "fruit", as she believes that it blurs the vision. Well, she couldn't risk her sharp vision that could still thread a needle at the age of 90. I don't think it blurs the eyes...I love it too much to believe it.

This is just a very simple way of cooking it, taught to me by my Big Kucheh, my father's eldest younger sis. Slowly pan frying it until it turns golden brown... and drizzle it with not so salty soy sauce. Simple, but yet, very very nice.

Elaboration: What I did was, I washed the eggplant, sliced it into 1cm thick pieces. Heat a wok/pan and put in some oil. Slide a few eggplant pieces in. If using a wok, the egg plants will automatically fill up the centre and soak up most of the oil. Just push them aside and put in more. So that the first few pieces will release the oil and let it flow down to the later pieces that is now in the centre. U have to lightly press them with ur spatula from time to time. Flip the eggplants one when side is golden. I place an oily piece over a not so oily piece and tap the oily piece to release the oil onto the non oily piece. This way, I don't use so much oil. These eggplants are oil suckers.
When all the egg plants are fried and golden, dish up and lightly drizzle with not so salty soy sauce.


*variation: U can smother them with miso paste too instead of soy sauce :)


Thursday, December 3, 2009

Coffee Cream Cheesecake


Another chilled cheesecake from Alex Goh


Sometimes some things are just made for each other, peanuts and coffee are a couple made in heaven.
We loved this cheesecake even before it hit our lips.. the smell of the coffee, with the peanuts and cheese......

I changed the topping of the original recipe from almond nibs to peanuts. And it was the perfect decision. I like all my coffee flavoured cakes to be paired with peanuts, just like pandan cakes must be paired with coconut :)

Here goes the recipe:

Sponge cake: any that u prefer, preferable size (Square: 9X9 X 1.5inch , round: 9X9 X 2inch). Cut into 2 layers or u can leave it as a single layer. I prefer double layer. If u want to use one layer, then use thinner sponges as preferred.

Filling:
250gm cream cheese, room temperature
200gm sweetenened condensed milk
150gm whipping cream, whipped
1 Tbsp instant coffee + 2 Tbsp hot water (I used Nescafe Gold, and it was so good, regular Nescafe was not as good)
1 3/4 Tbsp gelatin + 50ml water

Topping: 90gm toasted peanut nibs


1. Bloom gelatin in water for 2 minutes. Microwave on high for 30 secs or longer until gelatine dissolves. Leave to cool down.
2. Mix instant coffee with hot water. Stir to dissolve. leave aside to cool down.
3. Beat cream cheese and condensed milk until smooth and creamy.
4. Mix in coffee mixture, mix well.
5. Beat in gelatine mixture and mix well.
6. Fold in whipped cream.
7. Place 1 piece of sponge layer into cake ring/square case/spring form pan and pour half the filling onto it. Use a spatula to level filling.
8. Place the other piece of sponge and top with the balance of the filling. Level filling.
9. Immediately sprinkle toasted peanut nibs over cake and gently press.
10. Chill for 5 hours before serving.


There were 2 attempts here. The picture above was 2nd attempt and the one below was the first. Why are the colours of the fillings different? Well, I used different coffees. The first was Nescafe Gold, and the 2nd was Old Town White Coffee. Verdict: I love the version with Nescafe Gold.


Thursday, November 26, 2009

Oreo Condensed Milk Mini Cheesecake


The first 2 pics were first attempt. I broke up the oreos and stuffed them into the batter.
The one below with one whole Oreo is my 2nd attempt.


There's a cafe here in KK that makes yummy cheesecakes. I am thinking of recreating them.
Altho I know that they use whipping cream in their cheesecakes (a leak from a baking supplies shop), I am thinking of using condensed milk.

I saw a post on using condensed milk for cheesecake, and so, I adapted this recipe from there.

250gm cream cheese
150gm sweetened condensed milk
2 eggs, separated
1 small pinch of cream of tartar
1 Tbsp sugar
1 tube of Oreo (137gm)

*everything be at room temperature when u're ready to start.

1. Separate Oreos, leaving 12 pcs w/o cream intact and round. Put the rest of the biscuits together with the filling into a food processor and pulse til fine.
Remember to preheat ur oven (150C) and boil water after this.
2. Line big muffin tin (100ml capacity each) with 12 paper cups. Place 1 heaped teaspoon of oreo crumbs onto paper cups and smooth out with a teaspoon, lightly press the crumbs to flatten.
3. With a mixer, beat egg whites until frothy, add in cream of tartar continue to beat until soft peaks. Add in sugar and beat til stiff (as long as egg whites don't fall when overturned, it will be fine, no need to be pointy stiff). Set aside, and quickly do the next step.
4 Cream cream cheese on low speed until smooth (a minute or 2), put in condensed milk and egg yolks and continue to beat on low speed for another minute until well combined. Fold in egg whites.
5. Spoon (4) into prepared paper cups. Top with an oreo biscuit or u can break it up and put it where ever u like (middle, top)
6. Bake for 20 minutes in a waterbath.
7. Leave to cool in oven, door ajar. Cool completely before chilling.
8. Best chilled for 3 hours or more before serving.

*note: Malaysian Sweetened Condensed Creamer and Condensed Filled milk is generally sweeter than Condensed Full Cream Milk than can be purchased from out of the country. I made this recipe with Condensed Full Cream Milk, and so far those who ate what I made said it was just nice.

**Deflated egg whites will create a shorter and sweeter cake. Be careful when you fold in the egg whites. Don't deflate the batter.

I love this cheesecake. The beaten egg whites makes the cake soft and fluffy, unlike my marble cheesecake.

Really nice to eat, serious!!!


Monday, November 23, 2009

Avocado Chilled Cheesecake


Avocadoes... they can grow here. Only lately I knew that.
I used to think that they only grew in California... Muahahahaha!!!!

The avocadoes above were given to me by my children's nanny. They were grown in Sitiawan by her relative. I used them to make the tempting Avocado Cheesecake on the cover of Alex Goh's Fantastic Cheesecake cookbook. The recipe calls for yogurt in the cheese filling, of which I find the smell to be oh so unsuitable. I like the smell of milk with avocado in Vietnamese avocadoes milkshake, so next time, I'll omit the yogurt and sugar, and put in equal amounts of condensed milk.

The recipe in Alex's book:

Vanilla Sponge Cake (any variety, u can just use this recipe to make one)

Avocado Cheese Filling:
250gm cream cheese
60gm sugar
100gm avocado flesh (I used 200gm )
1 Tbsp lemon juice
1 Tbsp gelatin (I used 1 1/2 Tbsp)
50ml Water
100gm yogurt
200gm whipping cream

1. Place gelatin in a heatproof bowl and put in water. Leave for 2 minutes and microwave on high for 30 secs, or u can double boil it until the gelatin dissolves. Leave to cool to room temperature.
2. Cream cream cheese and sugar until smooth.
3. Combine lemon juice with avocado flesh and stir (or use a food processor) until smooth. Put this into (2)and mix until well combined.
4. Add (1) to (3) and stir until well combined. (I do all the mixing with a hand mixer). Add in yogurt.
5. Whip whipping cream until soft peaks and fold it into (4) until well combined.
6. Pour cheese filling onto sponge cake and level the surface. Referigerate for 4 hours or until set.


I like my chilled cheesecakes to be in 2 layers.... so it looks different than what is in the book.


I still have so many backposts................ Takes time to type them out... Those of u who've eaten this cake, u know how old this cake was :)
MIL's coming back from US next week, so it means, baking season is back...
More cheesecakes coming up soon......


Printfriendly

Related Posts Plugin for WordPress, Blogger...