New Youtube Channel

Now that my home's internet speed is upgraded, I can make more videos!
This is my new channel https://www.youtube.com/channel/UCgW4rIH3Gg6Lc8v4G0QlqgA
Please subscribe!

Wednesday, June 30, 2010

Black Soy Bean Milk


I have long suspected that black beans are in fact black soy beans. Then I saw on a TVB travel show that went to a Japanese soy farm to have some tofu, only did it confirm that what I have in my kitchen are really black soy beans. And lately I saw some organic black beans in Jusco, labled as black soy beans. Yup, what we usually call as black beans are indeed black soy beans.

I have almost 500gm of that in my pantry. My mother bought me a lot of black soy beans for my confinement (Lyanne’s), but my confinement lady didn’t use it all up. So, here’s a good reason to use up all those black black pearls.

100gm black soy beans (You can use regular soy beans with the same method)
500ml water +500ml water

1. Soak black soy beans overnight. Discard soaking water.
2. Put all the beans into a blender with 500ml water. Blend until very fine, for about 2 minutes.
3. Pour blended beans into a muslin bag and press to extract milk. You can use something heavy to press down the bag (elevated on the back of a plate in a tray) if you find it hard to extract the milk by just your hands.
4. Repeat blending process with another 500ml water, and extract milk.

*** You can Choose to combine 1st and 2nd extract together. But I prefer not to. Because I’m going to use the 1st extract to make tofu and the 2nd to drink. If u just want to drink it all, u can mix it together)

5. Put extracted milk into a pot/saucepan and put in a pandan leaf(stripped and tied into a knot). On medium heat(if making a lot, use high heat, but I’m only doing 500ml), bring it to a boil.
Be very careful and watch the pot carefully. The milk overflows easily when it’s boiling.
6. Season with brown or regular white sugar.

* I found that the milk curdles and is not that smooth once I added the brown sugar. Maybe it's due to brown sugar's acidic nature. Try regular white sugar for a smooth milk.


Monday, June 28, 2010

Fresh Apricot Galette with Almond Crust


The dough became a batter.
That was what happened when I followed the recipe (not telling the source ;-P ).

Then I checked other recipes out,
My Baker’s Dozen Cookbook says
1 cup flour and ¾ stick butter

Another site says
1 and ¼ cup flour for 1 stick of butter.

So how can this recipe I used call for 1 cup flour with 1 and ½ stick of butter. That’s like double amount of butter compared to the one in Baker’s Dozen. Gosh…. Learnt my lesson the hard way.

I added more flour and almonds to make the dough pliable, it’s still soft, but way harder than before. At least it's manageble.
With all the additional flour and ground almonds, I had such a big piece of rolled out dough that it didn’t fit my freezer or fridge, so I had to cut it out to a 12 inch circle. I’ll use the cut outs later for a tart,

I felt so “urgghhh!” that I didn’t even feel like glazing the side with butter and sugar before baking.

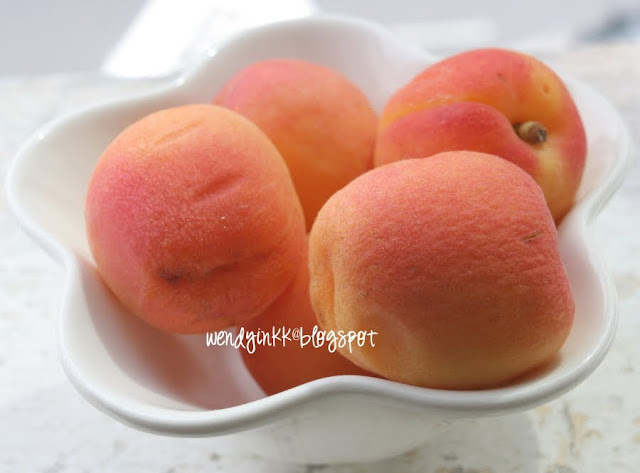
Now, look at these pretty rosy apricots and cool down...............................
They turned rosy after spending more than 2 weeks in the fridge. If you want them to ripen quick, just leave them overnight in a paper bag at room temperature.


Ok, I've cooled down.


This recipe below should be the one that works, I cut 33% of what I actually used in total for the dough today, since there were extra dough.
I rewrote the original recipe to be a logical recipe based on other recipes after everything was baked.

100gm all purpose flour
30gm almond meal
1 Tbsp icing/confectioners sugar
80gm salted butter (original needed 115gm, and trust me, it doesn’t work)
2-4 Tbsp ice water

5 ripe rosy apricots (they look yellow when unripe), please taste them at this point to determine how much sugar to sprinkle later
3 Tbsp sugar, more if they are tart.

Some melted butter
Extra icing/confectioner’s sugar for sprinkling

1. Preheat the oven at 180/200C. Prepare 2 pieces of non stick baking paper about 13 inches square
2. Mix almond meal, icing sugar and flour together. Rub in butter until mixture looks like crumbs.
3. Add water bit by bit until dough can be formed. You may not need all the water.
4. Lightly flour dough and place dough in between the baking paper. Use a roller pin and roll out the dough to be come a 11-12 inch circle with about 3-4mm thickness.
5. Peel upper piece of paper. Place paper back onto dough, lightly smoothen paper onto dough. (This is to ease removal later)
6. Place flattened dough, with the “upper” paper side down in your baking tray. Now, remove the lower paper that is now on top.
7. Place the whole tray to freeze for 10 minutes (or chill for 30mins).
8. Meanwhile, slice the apricots (you can use them unpeeled).
9. After 10 minutes, remove the dough from the freezer and arrange all the apricot slices onto the dough, starting from 4-5cm from the edge. Sprinkle sugar over apricots. Be generous if they are tart.
10. When arrangement is done, fold edges of dough over fruit (use the baking paper to help you fold), overlapping each other, so that there will not be tears or gap that will allow the juices to escape while baking.
11. Brush folded edges with melted butter and sprinkle with icing sugar.
12. Bake for 40-50 minutes or until golden brown. (I did 30 mins only as my apricots were starting to burn)


Verdict:
The apricots were so so tart!!!! I squinced when I ate them, even after I sprinkled sugar on, the sweetness went undetected. Only the sweetness from the crust tried to overcome the tartness of the imported apricots. I asked Mike’s aunt who also ate this whether the apricots she had back when she was in the UK tasted like this, she said no, they were much sweeter. Sigh, will sweet apricots ever arrive on our shore???? Even these super sour ones were RM10.90 for 5 pcs. I went to Jusco again the following week (after I got these) and I saw them at RM8.90 for 8 pieces. Prices do change fast.


Despite the super tart apricots, the crust was good. The ground almonds madethe difference. I’ll do this again next time, maybe with apples, or plums or canned apricots, hahaha. But not with fresh apricots again, unless I manage to get sweet ones.

Saturday, June 26, 2010

Lean Pork Soup with Arrowroot(Kudzu) and Octopus 粉葛章鱼瘦肉汤


It took me almost two and a half years to reach 100,000 hits.
But after that only 3 months to another 100,000 and I reached 200,000 hits yesterday.
Really surprising.

I only tried submitting to food sites, like tastespotting or foodgawker since last month, and boy, my hits really flew faster. Sometimes up to 5000 a day, and 52 persons on my site at the same time. My eyes got so big by the impact these food sites gave me. No wonder everybody go ga-ga to post on these sites. They really bring traffic in. But if these sites declines my pics, well, I can't care much about it. It's just for fun, and the most important thing to me are you, my readers, who keep on coming back and back to support me. Thank you very much. Love ya all, MUAAAAKS!!!!

Sigh, so far less than 5 persons have interest to try out the ginger milk curd.. sigh. Nvm then, high chances for 5 persons to win 2 bowls :) But actually the main objective is just to encourage you to try out, less than 10 mins of work in the kitchen but technically challenging. I can't be giving out Books or Mixers, or fancy bakeware. I don't have a sponsor. My purse's my sponsor. If only some kind hearted companies would want to sponsor my giveaways :) kakakaka. Actually when I did the Strawberry Mousse Cones with Chocolate Ganache, the ice cream cone company's current owner is actually a friend of mine, said he wanted to sponsor me some products, I'm not sure if he's for real, but he said so. So, Gary, where's the cones :)


Anyway, here's the soup... drink drink drink


From: Soups for Expelling Dampness and Heat by Chiu Sang

Indications: Diabetes, high blood pressure, high blood fat level (I don’t have any of these…. But it’s a good soup)
Functions: It benefits the spleen, stimulates the secretion of body fluid, quenches thirst, reduced blood glucose level and reduces blood pressure.

This is the original recipe
It went like this
900gm pueraria root / arrowroot / Kudzu
19gm dried oysters
300gm lean pork
1 dried octopus (38gm)
2 sprigs coriander
Salt to taste
No mention of water amount.


My adaptation
500gm arrowroot /pueraria root /kudzu
300gm pork loin
1 dried octopus ( 1ft long, I weighed it and it was less than 20gm)
1 Tbsp dried mussels ( I don’t have dried oysters at home)
1 sprig coriander
2.5L water
1 tsp salt

Method:
1. Rinse lean pork and scald in boiling water for 3 minutes.
2. Rinse and peel arrowroot/pueraria root. Cut into large pieces.
3. Rinse the remaining ingredients. Peel dried octopus and soak it in warm water for 20 minutes.
4. Put everything except coriander and salt into a pot. Add water and bring to the boil. Reduce to low heat and cook for 2 hours.
5. Season with salt. Add coriander and turn off the heat. Serve.


Peuraria root : resolves heat in the muscles, improves the elasticity of the sinews, enhances blood circulation, reduces blood glucose level, blood pressure and blood fat level.

Dried oysters and octopus: Clear heat, ease stress, stimulate the secretion of body fluid, regulate blood flow and invigorate the sinews.

Please do not try to omit the coriander. It helps to reduce the fishiness of the octopus and the oysters or mussels that you use.

Friday, June 25, 2010

Ginger Milk Curd n a Giveaway 姜汁撞奶


*Warning!!! Long Post Ahead!! Long Post Ahead!!!! Roger.

I saw on a Hong Kong eating show showing this dessert. The man just poured milk into the bowl and the host said, she’ll have that dessert in 10 minutes. So easy? Well, I’ve had this once, made from instant preparation powders brought back by my cousin from Hong Kong. It’s nice, I like it, so let’s try making it.. since the TV says it’s so easy

From Wikipedia:
Ginger milk curd, also known as ginger-juice milk curd or simply ginger milk, is a Chinese hot dessert originated in Shawan town of Panyu District(My grandparent’s place of birth), Guangzhou in the Guangdong Province in southern China. The main ingredients are ginger, milk, and sugar. Water buffalo milk is used in the original recipe.Ginger contains protease. When milk is added to ginger juice, protease catalyses hydrolysis of the protein in the milk, changing it from a water-soluble form to a water-insoluble form, and leads to the formation of milk curd.

Sometimes you will wonder how much one can learn from kids, and I really did learn a lot from these kids’ science project. They did lots of experiments with this simple dessert, from getting the proper PH, the proper temperature for setting. Simply marvelous. But they didn’t test the type of milk used, pasteurized, UHT, homogenized and raw milk. If only they did this, then the experiment will be ultra marvelous.


When you look at the process, it seems easy, right? I made 8 times of failed curds before I saw success. I only did 125ml each time, but hey, have to eat them up even thought they are failed curds, still edible, just that either they are too soft or still in liquid. Milk is fine..but ginger. So much???? I’m not in confinement, so my body cannot take so much of that, lest overload then deep trouble.  Hey, do you know that this is the perfect dessert for that day of the month?? Maybe you want to try making this on that day :)

I read a few blogs before I did it. All had different instructions, some to pull milk 6 times, some 10 times, some never pull but just tilt pan left and right. Some look for bubbles by the periphery of the milk, some look for steam… But all are playing the guessing game. And from many of the comments I saw (from reader’s tryouts), lots of them ended up with thinned down yogurt. I failed 8 times, some as thinned down yogurts, some still as milk. 

After my failed curds, I tried searching in Chinese again. One site said,80- 85C and guarantee success. But when I did it with my pasteurized and homogenized milk, it failed. I was at 80C because I was trying different temperatures. If you want to know what brand of milk that was, it was Goodday, fresh, homogenized, pasteurized milk.

I don’t know about you, maybe you can make it, but I can’t. Until I thought of the shop that I always buy natural yogurt from. If they can make yogurt with it, definitely I can make milk curd with that. So the next day, I went there to buy my RM3 worth of raw milk (about 600ml). Worked like a charm. The surface set almost immediately (you can test it when you touch the surface and no white liquid sticks to your finger) and was fully set in 10 minutes. Out of 5 attempt, 4 set nicely and one failed* because I didn't boil the milk properly and a skin formed on top. Explanation after the recipe.

Ginger Milk Curd Recipe (do it bowl by bowl)
One rice bowl amount: 
30ml (2 tablespoons) old ginger juice (Mine are the regular ones that are imported from China)
250ml milk
1Tbsp sugar


*I always do 125ml/bowl
Or if you want to fill a 6 oz ramekin (I find this amount just nice for 1 serving)
3 tsp ginger juice (15ml)
125ml milk
1 heaped tsp sugar

1. Put ginger juice into setting bowl.
2. Bring the milk and sugar to a boil, turn off the heat .Check temperature with a thermometer. Let it cool down to 85C. (If you don’t own a thermometer, leave the milk to cool down in the pot for 10 seconds)
3. Pour milk from 6 inches above bowl.
4. Let the curd set for 10 minutes
5. Enjoy warm or chilled.

*If you want to make more than this amount, pulling the milk might be required because a larger amount may take longer than 10 seconds to reach 85C.
If you can make yogurt with that milk, then you can use that same source of milk to make this ginger milk curd, because both processes act on the milk protein.

*When this attempt failed when all others succeeded with raw milk, the only difference was the layer of insoluble milk skin. Then I suspected that the proteins that are necessary for coagulation are all in the skin. I checked the internet and truly enough, I found on wisegeek, that when milk is heated, it forms a skin/membrane on top. The skin is comprised of solid proteins that combine with the milk’s fat molecules, which begin to evaporate as the milk is heated. These proteins, casein and beta, clump together when the liquid reaches a temperature of around 113 to 122 degrees Fahrenheit (45 to 50 Celsius). As the heating continues, the soft protein layer begins to dry out, which is why the milk forms a skin on the liquid’s surface. (So, when the protein is no longer in the milk, it cannot react with the ginger’s enzyme, protease). To avoid the skin from forming, just remember to stir it from time to time. And this does not happen with skim milk because skim milk does not contain fat. There is nothing for the protein molecules to bind with.


About pulling/stretching the tea (teh tarikking):
Some recipes call for this step, but I find that, the temperature’s way too low after pulling. From the lab experiment report, the optimum temperature for setting is between 62-67C. When I finished pulling it for 6 times, my temperature was at 50-60C (From various attempts). The temperature of the ginger juice has to be taken into account, the absorption of heat into the setting bowl has to be taken into consideration as well. And don’t forget, the pouring of milk from a distance into the ginger juice will reduce the temperature further. So, I don’t pull it anymore. And I find that, if I do it 125ml at a time, the moment I turn off the heat, I put in the thermometer to check, by the time the reading is stable, it’s already 85C, and it takes about 10 seconds. Larger amounts of milk may take slightly longer. So, I don’t find it necessary to pull the milk. Just turn it off, wait til all the bubbles go away and there, 85C. So, when it’s 85C when you pour it down, by the time it mixes with the ginger juice, touches the bowl and getting cooled by the pouring action, it’ll settle to a nice 62-67C.

See the spoon floating????

See the curd don't fall back in place... it stays put


About adding vinegar to the ginger juice,
Although my attempt with Goodday was fine with vinegar, but it is not with raw milk. It curdled up, not in a good way. Click on the picture to have a larger view.


Ok, so here goes the giveaway..

It is open to all residing in Malaysia and Singapore only with a valid Malaysian and Singaporean address.

Let us help out the blogosphere by trying to make ginger milk curd, with any brand or source of milk.
To join, you must make ginger milk curd and do a post on it. It doesn't matter you failed or succeeded, as long as u tried.

Send in a link to your website/blog to this page (through comments)
Or if you don’t have a website, email me (wendyinkk at yahoo.com) the pictures and details of the milk used to me. I'll post the emailed in try-outs in the other page.

One type of milk per entry, means if you tried out 4 types of milk, 4 entries, even though it's just one post.

Details that must be included in your post or email:
1. Pictures of milk curd that shows
     i. floating spoon on top to show that the curd has set firmly
     ii. a spoon of the curd or the eaten area of the curd to show the texture.
2. Brand of milk used, and if possible picture of milk carton/bottle
3. Type of process: Pasteurized/Homogenized/UHT/Microfiltration/Raw/Recombined/Sterilized
4. Type of milk: Fresh/Full Cream/Low Fat/Skim milk/Raw Milk
5. Fat and protein content on label by g/100ml (leave this if it’s raw fresh milk)
*If using raw unprocessed milk, just include information on where you got your supply, and skip step 2,3 and 5.
And any other information that you think may be important.

This is to help others who are interested to make ginger milk curd. Makes life easier for everyone when information is easily available.

Others who are not from these 2 countries may also submit your curd “report”. It’ll be so nice of you to do that. We’ll learn from your experience too.

Dateline is 15th July 12.00noon GMT+8.00

Oh yes, what’s for the giveaway?
Actually it’s not a Kitchenaid or an expensive book or some fancy bakeware….just 2 sets of bamboo bowls and spoon, like those in my pics. So, there'll be two winners.
Don’t worry, I’m not going to give you the one I’ve used, they will be brand new. I’ve bought quite a lot of these few years back, and they’re not from Daiso :)

Oh ya, I've actually tried out a few brand of milk from supermarket shelves. So far, one brand gave me fair result, not as good as raw milk, but it set with spoondable curds. I won't spoil the fun... but will spill the milk for you on result day.


Click here to see the entries and the brand that they used,

Wednesday, June 23, 2010

Comparison of Commercial Crop and Organic Soybeans


I wonder, if there is a difference between these two. So I bought some and did some simple testing

I soaked the same amount in weight for these beans and made soy milk the next morning. Gave it some simple taste test with my 4 senses, touch, vision, smell, taste and of course I can't hear soy beans.

THIS IS JUST MY PERSONAL OPINION.
YOU MAY THINK OTHERWISE

Soy crops from different farms from different countries differ,
 so this is not a generalization,
but just a comparison with the 2 types of beans that I have


Visually, commercial ones are smaller and organic one are bigger. The rest of the differences are in the table below.

So, in the end, will I use commercial crop soy or organic?


A mixture maybe.... Or maybe there's another organic soy out there that fares better than this from Mongolia.
I do believe there is another better organic soy bean out there, just that I can't get it, yet. 

Oh ya, this organic bean right, is the cheapest on Jusco's shelves. Hehehehe. Maybe I should just get the more expensive ones.

And commercial crops, some are imported from China, and I do not know how they taste like, since I've never bought some and did some simple testing on them.

Monday, June 21, 2010

Stone Fruit Tea Cake


No no… this cake is not hard like stone. Stone fruits are fruits that contain one hard seed in the middle and peaches, cherries, nectarines, plum, apricots are stone fruits. Mangoes and avocadoes, although seem to have only one seed in the middle are not stone fruits.

I had some blueberries from my MIL’s Japanese cotton cheesecake, and I don’t want to make muffins, nor pancakes. I am not thinking of crumbles because I do not have enough of it and buying another punnet is expensive, very expensive. Yeah, I’m a miser. RM15 for 1 cup of blueberries. I can have 3 lunches with RM15.

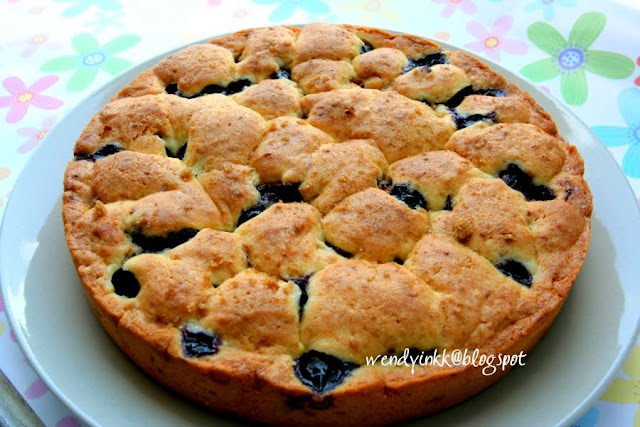
So I searched and searched online.. and this  looked interesting. Puddles of batter strewn over the cake, with fruits peeking from underneath. Unlike a crumble, unlike a cobbler, unlike a fruit pastry cake.. this looks interesting.

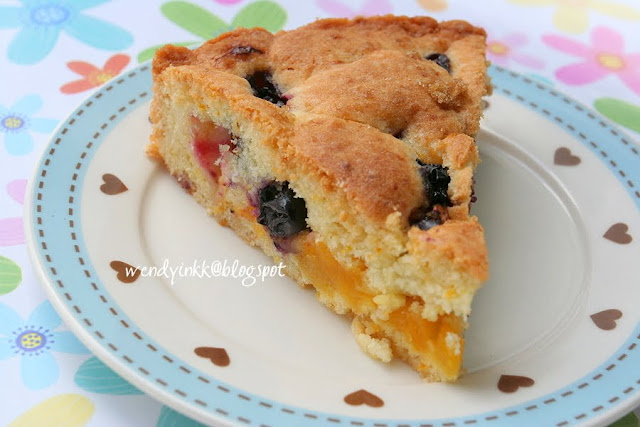
You can use any stone fruit that you like, but make sure that it’s not too ripe. One site I read, said she used peaches that were too ripe, and it caused the cake base to be damp. So, I guess canned peaches are out of the league, since those are ultra moist and wet. And another site also said no to strawberries as they are too juicy. I didn’t see any fresh peaches or apricots when I went shopping yesterday, so I reconstituted some dried apricots with orange juice. Changed the vanilla to orange zest.


The cake looked lovely when baked, and true enough, the plums added a pink purplish tone to the cake, the skin bled and make it look real nice. The reconstituted apricots were really sweet, literally. I think if fresh ones were used, the whole cake won’t be so sweet. Overall, I love this cake, and I’ll make this again when I see fresh peaches or apricots around, and I won’t be flavouring the dough with orange, but with vanilla, just like the original recipe states. I used orange this time because I reconstituted the apricots with orange juice, if you want to use vanilla, please just use water to reconstitute the dried apricots. I don’t mean that orange isn’t nice here, it’s nice, but I’d want to try the original version the next time.

Stone Fruits Tea Cake Recipe
1 Tbsp butter (for greasing pan)
150gm all purpose flour
½ tsp baking powder
½ tsp salt
100gm sugar (can be reduced to 80gm, I used dried apricots as filling and I found it the whole cake a bit sweeter than I’d prefer it)
80gm butter
1 + ½ egg
1 Tbsp orange zest
1 Tbsp brown sugar
75gm dried apricots (about 12) soaked overnight in 75ml orange juice
1 black plum, diced
70gm blueberries


1. Whisk the flour, baking powder, and salt together in a bowl. With a mixer, cream the sugar and butter together on medium-high speed for 3 to 5 minutes, until light and fluffy. Add the eggs one at a time, scraping down the sides of the bowl after each addition, then stir in the orange zest..
2. Add the flour in 2 or three shifts, mixing just until a smooth dough forms. It will be pretty soft still. Dollop it out onto two pieces of plastic wrap, making one mound of dough slightly larger than the other. Wrap the dough blobs in the plastic and form them into flat discs. Place on a baking sheet and stick them in the freezer for 30 minutes. While waiting, prepare and cut your fruits.
3. Preheat the oven to 160/180C. Butter a shallow, 8-inch baking dish or tart pan Take the slightly bigger parcel of dough and press it down onto the bottom of the pan. Scatter the fruit over the dough. Break the second disc of dough into tsp size balls and scatter them over the fruit. It will look charming no matter how even the blobs are, so don't worry too much about getting them perfect.
4. Bake for 30 to 40 minutes (I baked for 35), or until lightly golden and firm. Cool for 30 minutes before serving.

Wrapped in plastic wrap, this tea cake will keep at room temperature for up to 3 days. You can also freeze the unbaked dough; if wrapped well, it will keep for up to 3 months. You can freeze a whole, unbaked cake with fruit, wrapped well for 1 month.


Adapted from these two sites:
http://tastespace.wordpress.com/2010/01/21/stone-fruit-tea-cake-peach-tea-cake/
http://wildeyedbibliophile.blogspot.com/2009/08/apricot-blueberry-tea-cake.html
And here’s a gluten free version: http://makingromaroma.com/2009/09/10/rustic-tea-cake-gluten-free/

Sunday, June 20, 2010

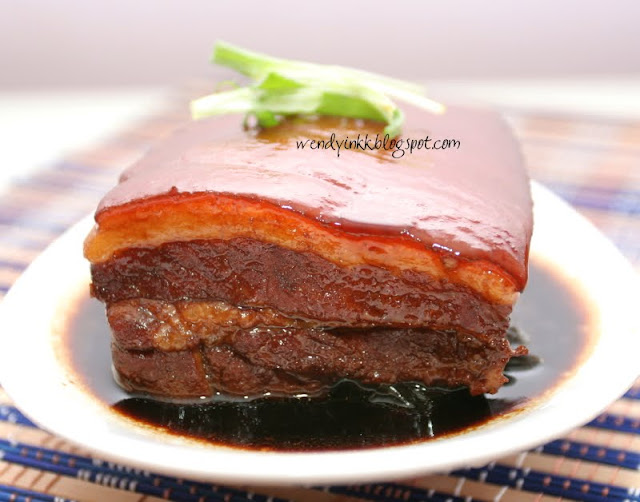
Dong Po Pork 东坡肉


Mike loves pork belly.. any pork belly. So does my mother in law. I only like it if the fat layer melts in the mouth with no fatty smell.

There are many recipes online, some requiring pre deep frying and usually this is restaurant’s method to speed up the cooking. The supposedly actual way is to slowly cook it in wine and soy sauce… no extra oil involved. I searched and searched, and found this recipe . Does this look good? Sure it does. But I think she skimped on the spring onions. The recipe called for trimming the sides to make it really squarish or at least, have straight sides, but to me, that seemed wasteful. So, I didn’t do that, just let it stay the in original shape. Initially one should use a clay pot to do this, but I don’t have one. So, I just used a heavy based pot that won’t burn as easily as a single layer stainless steel pot. 5 ply pots will be even better.

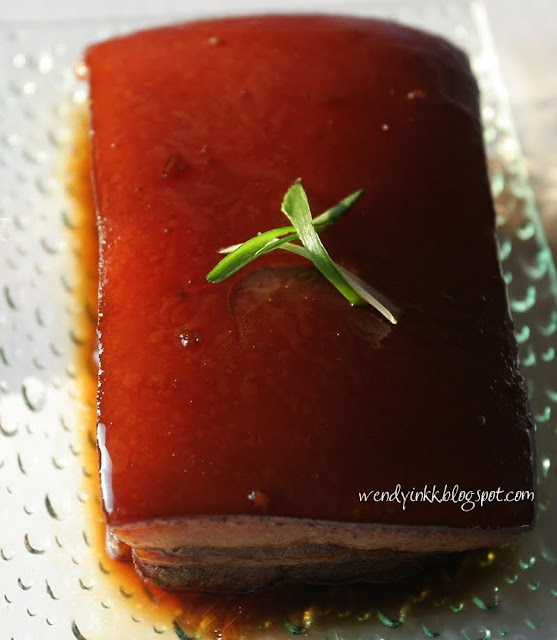
The belly turned out so good. The flavour was good, very good. I didn’t add any salt or additional seasoning to it and it taste absolutely good. Even when it was slowly cooking, my mother in law exclaimed about the fragrance. Oh please try this, but please have patience for almost 3 hours of work :)

1kg (+/-200gm) pork belly, skin on (original recipe called for 1kg, but I only have 800gm, it worked well, and I think the seasoning will even be enough for 1.2kg)
100gm spring onions
50 gm ginger (weighed skin on)
500gm Shao Xing Wine (the one I used was fermented for 5 years, and is more expensive than the regular 2 year old wines)
100gm light soy sauce
20gm dark soy sauce
80gm brown candy sugar(1pc) or rock sugar

1. Bring a pot of water to boil and cook pork belly for 5 minutes. Drain.
2. Cut spring onions into long lengths to fit base of pot. Slice ginger and sprinkle over.
3. Put boiled pork belly onto spring onions, skin side down.
4. Put in both soy sauces and sugar. Lastly wine. Add some water if the liquid level is too low. Make sure the pork is at least almost covered with liquid.
5. Bring pot to a boil on high heat, reduce to low and simmer for 2 hours (flipping the pork halfway), or until it is tender enough to be easily poked thru with a chopstick.
6. Remove pork belly (no gravy) from pot and put into a steaming dish, skin side up.
7. Steam on high heat for 30 minutes.(This is a crucial step, do not skip this)
8. Pour gravy (in pot) over pork when it has finished steaming.


It tasted as good as it looked.
The skin was soft and melted in my mouth
No fatty smell at all.


Thursday, June 17, 2010

Palak Tofu or Tofu in Spinach Gravy, and some Health Issues


I first tasted Palak Paneer or Cheese in Spinach Sauce more than 15 years ago in a Northern Indian restaurant. This is an Indian Vegetarian Dish. I fell in love with it. I don’t have Paneer at home, but I do have silken tofu. Why not substitute Paneer with tofu? They’re both white.   :)

I know it’s easy to make Paneer.  I saw Chef Michael Smith do that with milk and lemon juice. But 8 cups of milk for just that 1 small piece of cheese in return??? Nah, that’s too pricey. Tofu is much much cheaper. Chinese cheese that is, anyway. Cheapskate

At first glance, Mike said, what yuck is that??? But when he eats it…. Yummy.
So, do not judge this by it’s looks. It’s really good.

Palak Tofu (Serves 2-4)
150gm spinach (Por Choy not Yeen Choy(bayam), which is Amaranth), cut into 1 inch lengths.
1 smallish onion, about 30gm,
1 medium sized tomato
1 clove garlic
1/2 cup water
(omit both onion and garlic if Chinese Vegetarian)
Simmer onion, tomato, and garlic in water until soft. Remember to cut them smaller to reduce cooking time. Put in spinach. Cook until it wilts. It should only take less than 1 minute for that. Remove from heat. Puree until fine.

1 block silken tofu, cut into large pieces.
1 tsp butter
1/2 tsp cumin seeds, (Jintan Manis in Malay, do not leave this out, crucial, CRUCIAL!!!!)
Salt to taste, about 1/2 tsp.

Heat pan/wok on medium heat and put in butter. When butter has almost melted, put in cumin and fry until very fragrant. It should take u about 10 seconds. Put in prepared spinach gravy. Bring to a boil and season with salt. Put in tofu to warm up. Pour into a deep dish to serve.

***Do not prepare the spinach gravy too early, it turns brown in just 2 hours.


Health Issues
Oh yes, I've got some people telling me that spinach are not to be cooked together with tofu and some also  said they should not be consumed together on the same day. Ask them the reason, they do not know why.

So, I did some research on the internet,

Spinach contains oxalic acid and tofu (those made with gypsum, sek koh fun) contains a high calcium amount. Oxalic acid in spinach binds with the calcium in tofu and forms an insoluble oxalate that later will turn to kidney stones. Please read here, especially the part about "Calcium". Soy milk on the other hand does not contain much calcium that can be absorbed by the body, and so is safe to be consumed with spinach. So, the culprit here is the gypsum, not the bean.

So, should you try this dish out??? Yes, why not? It's the calcium from the gypsum that's the problem. Just buy those that are not made with calcium sulphate which is gypsum or sek koh fun. In Singapore it's not a problem because all tofu there are not made with gypsum, but in Malaysia, please read the labels and select tofu that does not contain  "calcium sulphate/gypsum/sek koh fun", and get those coagulated with GDL or magnesium sulphate. These types of tofu are easily available at supermarkets/hypermarkets. If you buy at the wet market, most probably they are made with gypsum.
But if to you, once in a while thing is not an issue, then let it be. Any tofu will do.


From Wikipedia "Oxalate occurs widely in the plant kingdom, e.g. fat hen (lamb's quarters), sorrel, and Oxalis species. The root and/or leaves of rhubarb and buckwheat are listed as being high in oxalic acid.It arises biosynthetically via the incomplete oxidation of carbohydrates.

Other edible plants that contain significant concentrations of oxalate include—in decreasing order—star fruit (carambola), black pepper, parsley, poppy seed, amaranth (bayam), spinach, chard, beets, cocoa, chocolate, most nuts, most berries, fishtail palms, New Zealand spinach (Tetragonia tetragonioides) and beans. The gritty “mouth feel” one experiences when drinking milk with a rhubarb dessert is caused by precipitation of calcium oxalate.[citation needed] The calcium is abstracted from the casein in dairy products.

Leaves of the tea plant (Camellia sinensis) contain among the greatest measured concentrations of oxalic acid relative to other plants. However the infusion beverage typically contains only low to moderate amounts of oxalic acid per serving, due to the small mass of leaves used for brewing. "


Read this too: Taken from here

The following are some examples of the most common sources of oxalates, arranged by food group. It is important to note that the leaves of a plant almost always contain higher oxalate levels than the roots, stems, and stalks.

Fruits
blackberries, blueberries, raspberries, strawberries, currants, kiwifruit, concord (purple) grapes, figs, tangerines, and plums

Vegetables (see Table 1 for additional information)
Most oxalate-dense vegetables: spinach, Swiss chard, beet greens, collards, okra, parsley, leeks and quinoa
Moderately dense in oxalates : celery, green beans, rutabagas, and summer squash would be considered

Nuts and seeds
almonds, cashews, and peanuts

Legumes
soybeans, tofu and other soy products

Grains
wheat bran, wheat germ, quinoa (a vegetable often used like a grain)

Other
cocoa, chocolate, and black tea


So, after reading this,
Do you think it's only spinach that you should avoid with gypsum tofu or any other calcium rich foods???
No, it's like a whole list of food and tea

You can't eat your poppy seed cake, your summer fruit tart made with all sort of pretty berries, stir fried okra, your favourite bayam soup, or Chocolate cake, or even Milo when you are having Gypsum laden tofu that day. No nuts that day, no wine (they are made with grapes eh), no whole wheat stuff (cos they contain bran and germ), no teh tarik, no Ooloong... on the day you eat old fashioned tofu.

So whatcha gonna eat???
Just eat the tofu with plain rice and you'll be safe.
Or start buying tofu not made with Gypsum, then you can eat anything you like that day.

And it's not only old fashioned tofu, but any soluble, absorbable calcium rich foods that should be avoided with food that contains oxalic acid (which is like almost everything plant derived). Think about your calcium supplements, your favourite Hi-Calcium Milk, your yogurt, your cheese, your Hi-Calcium biscuits, your sardines, your ikan bilis. All these will react with the spinach, the star fruit, the grapefruit, the nuts, the berries and the chocolate you ate that day. And remember no Chinese tea or ice lemon tea after eating these.


How much can you avoid????
Better don't eat anything then.

Wednesday, June 16, 2010

The story of Two Dumplings


So, what happens when two dumplings meet each other????
*
*
*
*
*
*
*
*
*
*
*
*
They get ready to be eaten!!!!!


Hahaha, that's my lame joke.
Anyway, do they look the same? From the outside yeah..but from the inside, no.

I think if you have been reading my blog for quite a while you will know that my husband is a Hokkien and I'm a Cantonese. I can't speak a word of Hokkien before I knew him, well, but I can understand the "universal Chinese dialect words" that most understands. Neh, those that you will use to ask about people's parents. Hahahaha, I do no speak them, but that doesn't mean I do not know if someone is scolding me or cursing me behind my back or maybe right in my face.

Mike told me he never spoke much Cantonese, not until he met me, and the first few months of our relationship, we will always argue because he uses the wrong words to express himself, making me misunderstand him. But now, his Cantonese is definately much much better after all the commando training I've given him. :)
His Cantonese has improved, definately, but what about my Hokkien. Hahahahah!!!! Well, he's got TVB to be his guru, but me? I've got nobody,
 **** nobody nobody but you.... nobody nobody like you, nobody nobody, nobody nobody, nobduy nobody ** with fingers twidling upright****

Bloggers who've met me, have heard me saying those few words over and over again only.
"Pai See" (naughty), "Ai Boh" (you want?), "Beh Sai" (Cannot), "Lai Ji Beng" (come here), "Kee Lau Ting" (Go upstairs) and maybe some other simple words. Yeah, these are the only ones that I can utter from my mouth. Trying to teach my girls the very few words that is in my personal collection of Hokkien Vocab.
Oh and the other day, Judy (Busy Gran) taught me how to call Gan Sui Joong in Hokkien, "Kngee Chang". Another new word... kekekeke.

Yeah, about those two dumplings, I just made these yesterday, yes, yesterday 15th June. This is the 2nd batch of rice dumplings I made this year. 1st batch wasn't enough to go around because my neighbours suddenly popped over asking for a few (in exchange with $$$), and a few became half the batch because each take 10, then 10 then 5 and another 5+2. So, after I came back from my dumpling making trip in Kampar last weekend, I made another 36 pieces yesterday.

So, my dumpling feat for this year

Hakka Dough Dumplings : 16 pieces
Plain Gan Sui Joong : 50 pieces
Hokkien Bak Chang: 1st batch: 44pcs, 2nd batch : 15 pcs
Cantonese Rice Dumpling : 1st batch : 23 pieces, 2nd batch: 24 pieces

Altogether: 174 pieces.

Well, I had some help with the 1st batch from my mom and 2nd sis in law. I didn't do this all by myself ok.

Anyway, glad this is only once a year. I'll be looking forward to next year, Nyonya Chang, wait for me ya.
Then in 2012, maybe hakka pillow dumplings... one year one new recipe to learn.


 Happy Dragon Boat Festival, or Dumpling Festival
or Duan Wu Festival,
whatever you may call it, and most of all,

Enjoy the dumplings!!!!
I think I'm getting sick of them already..... hahaha!!

Tuesday, June 15, 2010

Johor Laksa


I think this is the least known Laksa in Malaysia. Even my Malay colleagues have never heard of it. Well, They know laksae, laksam, laksa utara…
Sarawak laksa , Nyonya Laksa and Assam Laksa is more popular with the Chinese, but hey, Johor Laksa is a Malay Laksa.

Johor laksa is spaghetti served with a thick spicy fish gravy, topped with fresh vegetables. The gravy is a marriage between Laksam and Curry. The condiments is almost Laksam like, except for the preserved radish. When u finish eating the laksa (spaghetti), the gravy will be gone too, just like eating spaghetti Bolognese.

Although this is Johor Laksa, but it is not found all over the state. I’ve been staying in Segamat which is located in north Johor for 2 years(2004,05), and it was not seen or even heard there. This laksa is only popular at the tip of the sweet potato, in Johor Bahru(JB). I stayed in JB for almost 1 year(2003), and during fasting month, I’d be scouring the food stalls looking for the best Johor Laksa. There are RM2 per portions, RM4 per portions, some even RM5. Why such a major difference in price??? It’s in the gravy. Once I bought the RM2 stuff, being adventurous, just wanted to know how different is the 50% off. I tell you, I regretted that I wasted the RM2. It’s so watery. Just like Malay’s penang laksa, but with curry powder and thinned coconut milk. It’s disgusting, I’d say. I’ve learnt my lesson and the next time, I’ll hunt down the most expensive one at the food market, and those never fail my tastebuds.

Actually, the best that I’ve ever eaten was at Giant Plentong, the stalls’s name is Cathay Laksa. Cathay laksa is the one that introduced me to this addictive noodles. I was working for a local bank, during my uni semester holidays (2000) doing credit card roadshows. I was taken to Giant Plentong for 14 days and I only learnt about this new laksa during week 2 and then on, I had to eat it everyday, until the last day of the roadshow.

If you want to give this a taste before making this, and is thinking of Laksa Shack. Forget about it. They served good laksa Johor years ago, but not now. It's so diluted and taste oh so... like the RM2 stuff I got back in JB. Don't even think of eating Laksa Johor there.


I found this recipe from a local Malay recipe portal, and usually, the local recipes do not provide accurate measurements, something like segenggam (fistful), secukupnya (as needed, how much is needed?), gelas(glass, err.. I think the glasses at my house is different than those at ur house), cawan kopi(coffee cups?? Esspresso? Cappucino??), mangkuk sederhana (how big is the medium mentioned??).. and many others. I wonder how can such recipes be followed. But this recipe, is quite accurate. Giving detailed measurements except for the salted fish. Well, I made this Johor laksa twice, twice using this same recipe, so this recipe really works, no first time wonders. I didn’t put in galangal this time around, cos I can’t get it. It was shriveled up everywhere I tried to find it. I don’t know when will the new stocks arrive, but duh, just skipped that, and it was still fine. I did some minor adjustments to the recipe and I guess I’ll follow this the next time I do it again.

Here goes the recipe. It's pretty long winded and it can serve 10-12 persons.

(A)
20 shallots, mine came to about 250gm, peeled
20 dried chillies, seeds removed
1 bulb garlic, mine was about 30gm, peeled
1 inch ginger, about 15gm

1. Blend everything into a paste with ½ cup cooking oil.
2. Cook the paste until very fragrant.(pic on right)
**No need to wash the blender after this. Continue to use the same blender unwashed until (D).

(B)
500gm Spanish Mackeral/tenggiri
1. Boil fish with 3 cups water until cooked. (pic on right)
2. Take the fish out (retain broth) and let it cool down. Remove bones.
3. Pulse with with another 2 cups water.

(C)
100gm dried shrimp
250gm dried salted fish- Threadfin/Tanau/Senangin
1. Soak dried shrimps.
2. Toast salted fish on a pan until fragrant. U can use charcoal to toast if u want. Remove flesh from skin.
3. Blend dried shrimps and salted fish flesh with 2.5 cups water.

(D)
5 stalk lemon grass (4 inch from base)
100gm freshly grated coconut
1. Toast coconut on a frying pan until fragrant and golden. (pic on right)
2. Slice lemon grass finely and place into the blender together with toasted coconut.
3. Blend with 1.5 cups water.


(E)
4 Tbsp tamarind paste
200ml thick coconut milk
2 heaped Tbsp fish curry powder (1 small pack of 50gm)
Salt to taste

Final assembly.
1. Put (A), (B), (C), (D), fish broth, tamarind paste, thick coconut milk, fish curry powder all into one pot with at least 5L capacity.
2. Bring a boil and let it simmer (lid on) for 30 minutes or until coconut oil is released. Season with salt. Turn off the heat and let the gravy sit , lid on.
3. Best made 12 hours ahead before serving

Condiments
1. Calamansi lime
2. Bean Sprouts, ends trimmed
3. Long Beans, finely sliced
4. Chopped preserved radish, soaked for 30 minutes, squeezed dry, dry fry until hot and dry.
5. Basil (daun selasih) or Laksa leaves(daun kesum). Washed and remove from stems.
6. Cucumber, finely julienned without the seeds
7. Sambal Belacan, six fresh red chillies blended with a thumbsized belacan. Uncooked. You can control the spicyness with this.


To serve
1. Cook 1 packet(500g) of spaghetti according to packet’s instructions. (I used San Remo’s Vermicelli)
2. Divide spaghetti into 10 portions. Top with condiments.
3. Ladle over gravy. Squeeze juice of 1 calamansi over and toss everything.
Voila!!! Yum yum!!!


You can either do it condiments bottom and gravy on top or gravy below and condiments on top for better presentation, but the former is the actual way.


Printfriendly

Related Posts Plugin for WordPress, Blogger...