Roughly about 12 years back, during uni's 2nd year, my housemates and I held a pot luck at our newly moved in student house. We invited friends and seniors over. One of my seniors, Peggy, brought a fantastic mashed potato and it was mashed together with hard boiled eggs. The egg yolk lent a wonderful aroma to the mash. Yummy!! That was all I can say.
Allan CCM, if you're reading this, please tell Peggy, ok!!
It's not difficult to make...
The rule of thumb that I abide with whenever I make this is
1 Russset Potato : 1 hard boiled egg : 1 Tbsp butter
Easy and nice!

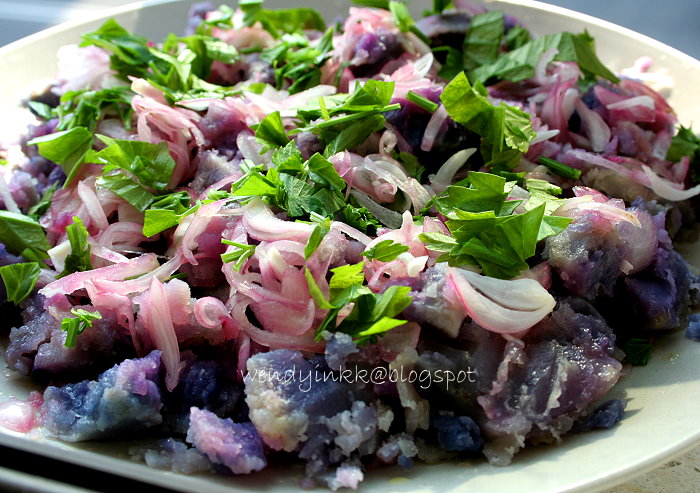
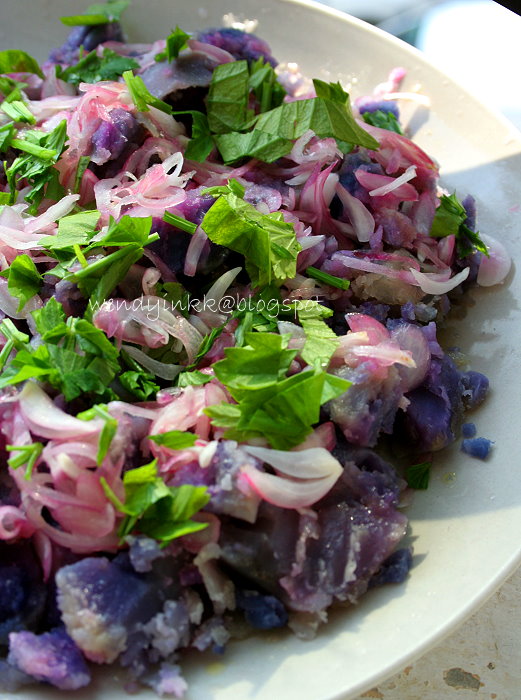
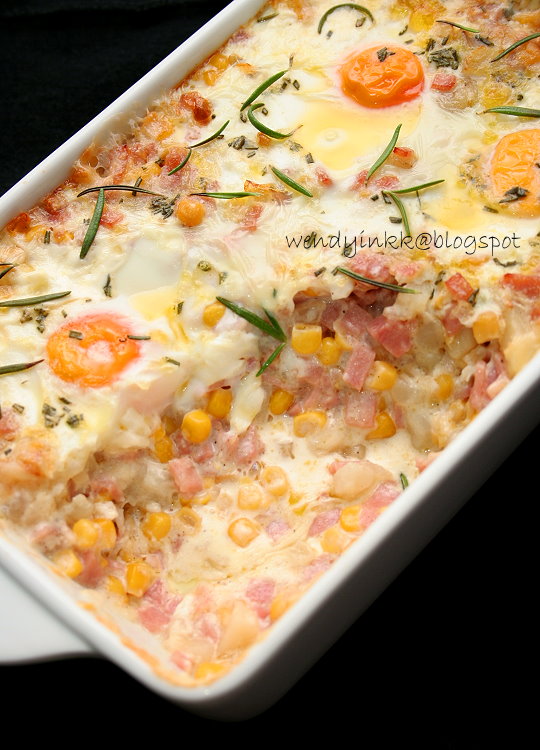
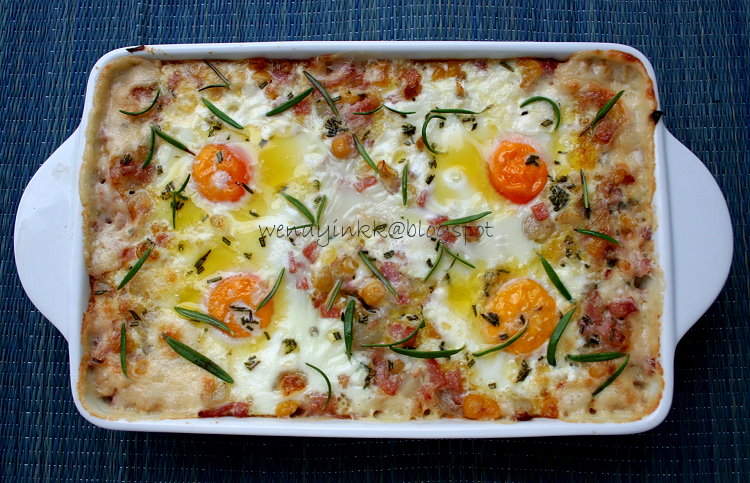
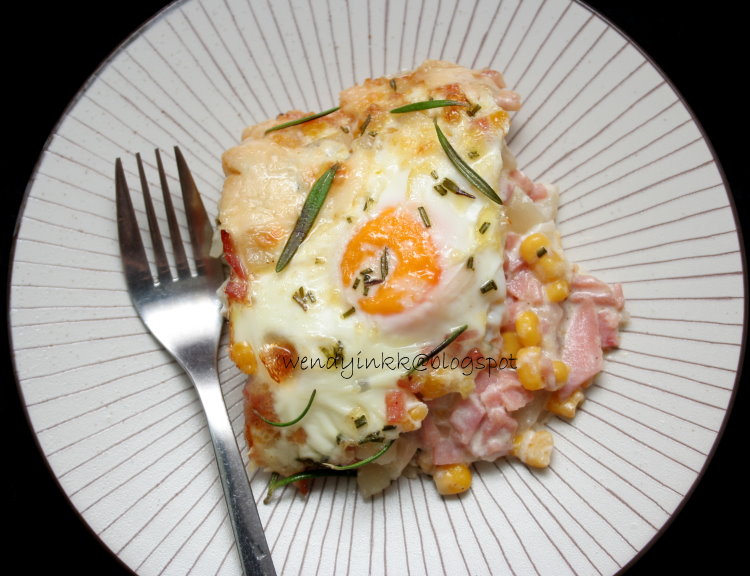
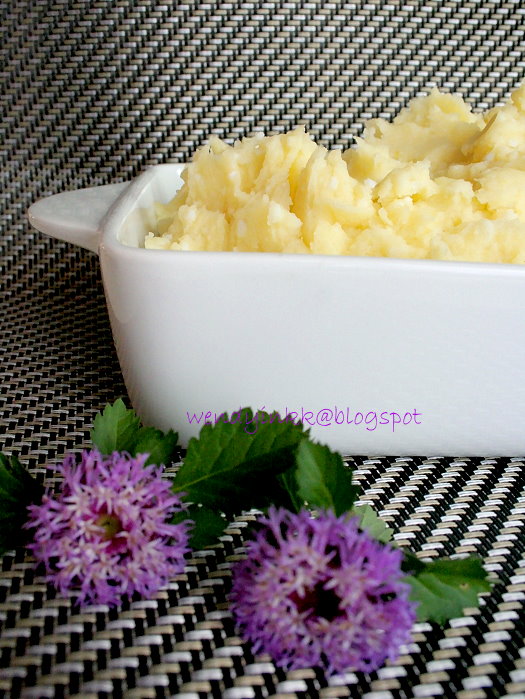
Mashed Potatoes with Eggs
Recipe source: Wendyywy
Inspired by: Peggy
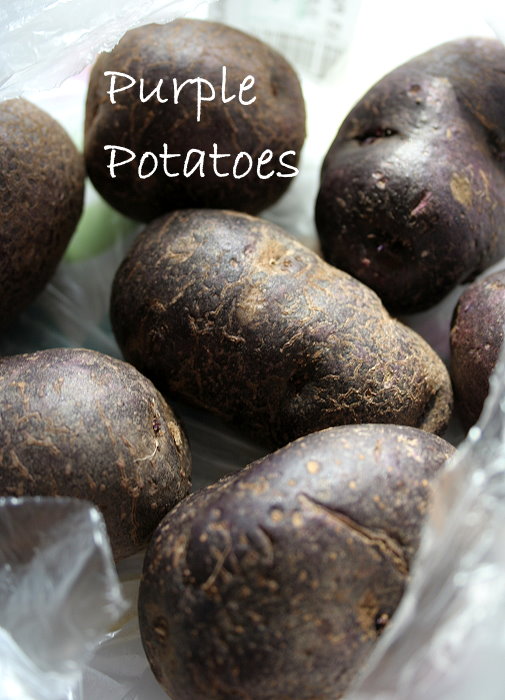
4 russet potatoes
4 hard boiled eggs,
4 Tbsp butter
Salt and pepper to taste
1. Bring a pot of water to boil (won't need to big a pot, 5-6 cups of water will be sufficient)
2. Peel and cut potato into chunks.
3. When water has come to a boil, put in 1 tsp salt into the water.
4. Put in potatoes and boil until soft.
5. Drain potatoes and put into a mixing bowl.
6. Put in peeled hard boiled eggs and butter into the hot potatoes. Put in 1/3 tsp salt and some pepper.
7. With a mixer, whip the potatoes until they look all mashed up.Taste and adjust if not salty.
8. Serve with roast or just eat it on its own. Yummy!!!
All these pics were taken during the period of time where my dearie set the ISO to 1600!!!
And I was just stupid stupid taking ugly pictures not knowing why
Very high noise problem and super hard editing them.
***************************************************
Announcement
Dear Readers,
This will be my last post for potato week.
I need to take another break, this time, for much longer.
I do not know when I'll be back, probably 3-4 weeks time, maybe sooner, maybe later.
I'm moving, yes I am. Finally!!!
The house has been renovating since October 2010 and it's time to move in and I'm busy with the final fittings and packing and unpacking stuff.
I'll still be checking email from time to time and the comments section too, just in case some of you have questions, but I cannot promise prompt reply.
Thankyou and I'll see you again with pictures of my new kitchen.
Love ya all,
Wendyywy